2. I think up a story that's short and easy.
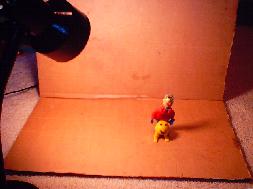
3. I get my stage, lights, and my camera ready. My stage is a big piece of cardboard folded in half. My light is just a study lamp.
3. I get into a program called Stop-Motion Animator (see Links) and start!
4. I set the frame rate to 12 frames per second. Then I move my clay figure just a little bit, and then I take a picture. Then I move my clay figure just a little bit, and then I take a picture . . . This can get kind of boring . . . here's where you'll need patience. When I'm all done, I save the movie. (In Stop-Motion Animator, press "Done".)
6. Once I've saved it, I get into Windows
 Explorer. I go to the directory where it was saved in
 and then double-click it. I use Windows Media Player to view movies.
7. Then I sit down and enjoy the movie!
